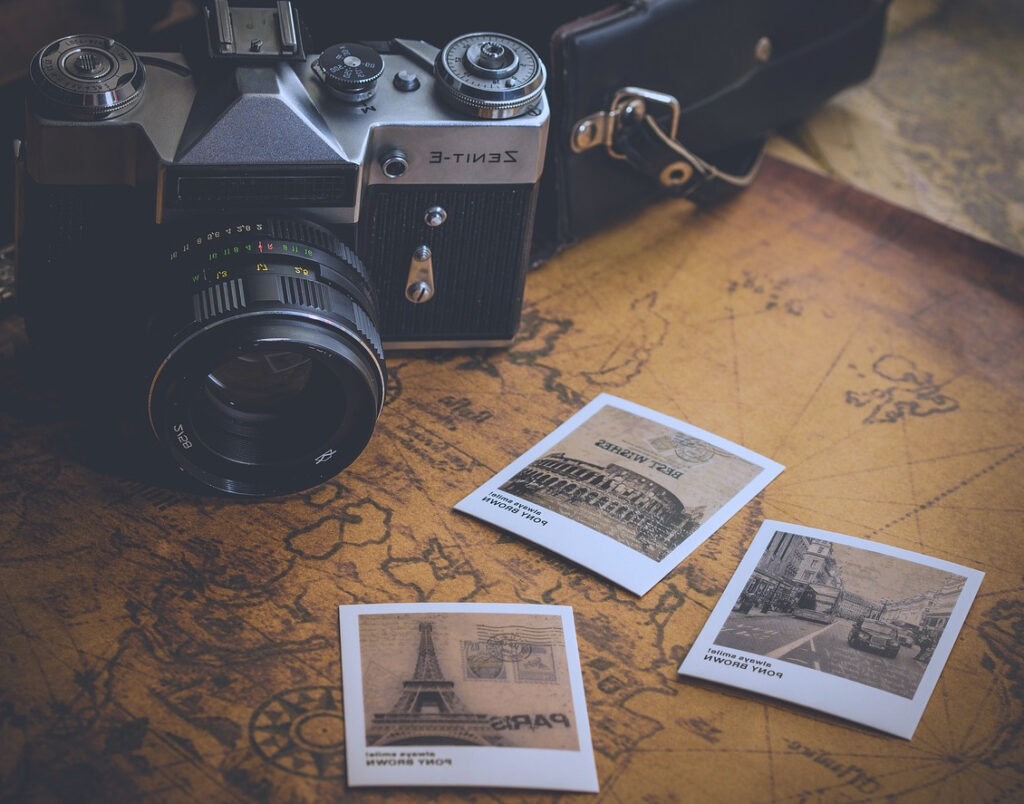
Dear guys! Are you excited to know about trending functions ( Best Light room Presets for Lifestyle Photography ) in photo editing. This Adobe app or tool will undoubtedly aid you in the rapid development of photos.
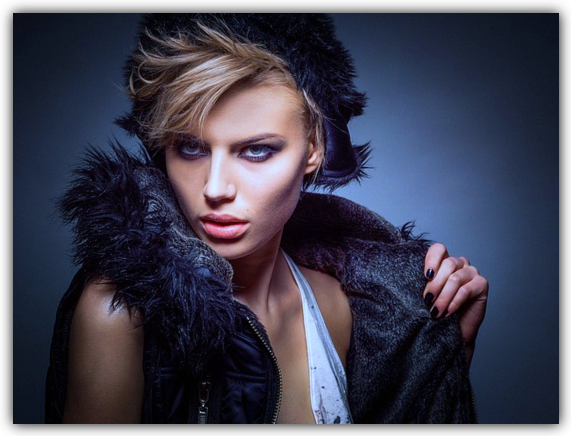
Adobe Lightroom, a powerhouse in photo editing software, offers a range of presets tailored specifically for lifestyle photography. These presets provide a shortcut to achieving stunning visuals, allowing photographers to transform their images with just a few clicks.
The Power of Presets
Adobe Lightroom presets are pre-configured settings that allow photographers to apply consistent and professional-grade edits to their photos. They serve as a foundation for creating a cohesive look across an entire collection of images.
Presets enable photographers to experiment with different styles, moods, and tones without starting from scratch each time.
For lifestyle photography, where capturing candid moments and genuine emotions is key, presets can significantly streamline the editing process while maintaining the authenticity of the moment.
Choosing the Right Preset
When delving into the best light room Presets for Lifestyle Photography, it’s crucial to choose presets that complement the theme and mood of your images. Adobe offers an extensive range of presets, each designed to evoke specific feelings and aesthetics.
Whether you’re aiming for vibrant and energetic shots or a more muted, nostalgic vibe, there’s a preset for every creative vision.
It’s recommended to experiment with different presets and fine-tune them to align with your unique style.
Consistency across Images
Lifestyle photographers often capture a series of images during a single session, each reflecting a different aspect of a person’s day-to-day life.
Maintaining consistency in editing across these images is essential for creating a visually harmonious story.
Adobe Lightroom presets excel at achieving this consistency, ensuring that the colors, tones, and overall atmosphere remain cohesive throughout your photo set.
Customization and Flexibility
While presets provide an excellent starting point, Adobe Lightroom also offers ample room for customization.
Photographers can adjust various parameters like exposure, contrast, saturation, and more, to fine-tune the preset’s effect according to their specific image.
This flexibility allows photographers to infuse their unique touch while still benefiting from the preset’s initial impact.
Streamlined Workflow
In the Best Light Room Presets for Lifestyle Photography, capturing the fleeting moments of genuine emotions is paramount. Adobe Lightroom presets speed up the editing process, giving photographers more time to focus on the creative aspects of their work.
By reducing the time spent on repetitive tasks, such as color correction and tone adjustments, photographers can dedicate more energy to storytelling through their images.
Do professional photographers use Lightroom presets?
Yes, a lot of reputable photographers use Lightroom presets in their jobs. Presets in Adobe Lightroom are essentially pre-defined settings that allow photographers to apply specific edits and adjustments to their photos with a single click.
Here’s how presets are commonly used by professional photographers:
Time Efficiency: Professional photographers often work on a large volume of images, especially after events or photo shoots.
Using presets can save a significant amount of time by quickly applying a consistent look or style to multiple images, which is especially useful when delivering images to clients or for posting on social media.
Consistency: Maintaining a consistent look across a series of images is crucial for branding and creating a signature style. Presets enable photographers to achieve this consistency easily, ensuring that all images from a particular shoot or project share a similar aesthetic.
Experimentation: Presets provide a starting point for experimentation. They allow photographers to try out different styles and effects on their images without starting from scratch. This can be particularly helpful when exploring new creative directions or trying to achieve a specific mood.
Client Expectations: Clients often have specific preferences regarding the editing style of their photos. Presets can help photographers quickly meet these expectations by applying presets that align with the client’s desired look and feel.
Customization: While presets offer a predefined set of adjustments, they can be further customized to suit each individual image. Professional photographers often fine-tune presets to match the lighting conditions, subject matter, and overall vision of a particular photo.
Learning Tool: Presets can also serve as valuable learning tools for photographers who are new to editing or trying to understand how certain effects are achieved. By studying the settings within a preset, photographers can learn about the interplay between various editing parameters.
Efficient Workflow: Presets can be integrated into a photographer’s overall workflow, enhancing efficiency. For example, a photographer might use a preset as a starting point, make additional adjustments as needed, and then save those adjustments as a new preset for future use.
How do I make Lightroom presets?
Creating Lightroom presets can be a fun and creative process.
Here’s a step-by-step guide to help you make your own Lightroom presets:
Step 1: Choose an Image to Edit
Start by selecting an image that you want to use as the base for your preset. This image should represent the style or look you want to achieve with your preset.
Step 2: Edit the Image
Edit the chosen image to achieve the desired look. Adjust settings like exposure, contrast, highlights, shadows, whites, blacks, saturation, vibrance, clarity, and any other adjustments that contribute to the style you’re aiming for.
Step 3: Open the Develop Module
In Adobe Lightroom, navigate to the Develop module, where you’ll find all the editing tools.
Step 4: Apply Adjustments
Apply the adjustments you made to the image in Step 2 to achieve the desired look. Make sure you fine-tune each adjustment to get the best results.
Step 5: Open the Presets Panel
On the left side of the Develop module, you’ll find the Presets panel. Click the small ‘+’ icon at the top of the panel to create a new preset.
Step 6: Name Your Preset
A dialog box will appear where you can name your preset. Choose a descriptive name that reflects the style or effect of the preset.
Step 7: Choose Settings to Include
In the New Develop Preset dialog box, you can choose which settings to include in the Best Light room Presets for Lifestyle Photography. These settings are grouped into sections like Basic, Tone Curve, HSL/Color, Split Toning, and more. Check the boxes next to the settings you want to include in your preset.
Step 8: Save Your Preset
Once you’ve selected the settings you want to include, click the ‘Create’ button to save your preset. It will now appear in the Presets panel with the name you provided.
Step 9: Apply Your Preset
To apply your newly created preset to another image, simply select that image in the Library module and then click on your preset in the Presets panel. The preset’s adjustments will be applied to the image.
Step 10: Adjust and Customize
Keep in mind that presets might not work perfectly on every image due to variations in lighting, subject matter, and other factors. After applying the preset, you can further customize the settings to suit the specific image you’re working on.
Step 11: Export Your Preset
If you want to share your preset with others or use it across different devices, you can export it. Right-click on your preset in the Presets panel and choose ‘Export’. Save the preset as a.lrtemplate file.
Step 12: Import Presets (Optional)
To use your exported preset on a different computer or device, you can import it. In Lightroom, go to the Edit menu (on Windows) or the Lightroom menu (on macOS), choose Preferences, and then click the ‘Presets’ tab.
Click the ‘Show Lightroom Develop Presets’ button to open the Lightroom Settings folder. Copy your exported preset file into the ‘Develop Presets’ folder, and then restart Lightroom.
How do I create and sell my Lightroom presets?
Creating and selling Lightroom presets can be a rewarding endeavor if you’re passionate about photography and post-processing.
Here’s a step-by-step guide on how to create and sell your Lightroom presets:
1. Develop Your Style:
Before you start creating presets to sell, it’s important to have a clear and consistent editing style.
Define the aesthetic you want to offer potential customers. This could be anything from vibrant and colorful to moody and vintage.
2. Create Presets:
Develop a set of presets that showcase your editing style. These presets should be versatile enough to work on a variety of images while maintaining the look you’re known for. Make sure each preset is well-crafted and delivers the desired effect.
3. Test Your Presets:
Before selling your presets, extensively test them on different types of images and lighting conditions to ensure they perform well across various scenarios.
4. Set Up Your Online Presence:
Create a website or use platforms like Etsy, Gumroad, or Creative Market to sell your presets.
Your online presence should be professional and reflect your branding. Include sample images showcasing your presets’ before-and-after effects.
5. Pricing Strategy:
Determine how much you’ll charge for your presets. Consider factors like the quality of your presets, your target audience, and the competitiveness of the market. Pricing can vary widely, so research other preset sellers to gauge appropriate pricing.
6. Write Descriptions:
Write detailed and engaging descriptions for each preset pack. Describe the style, effects, and scenarios where your presets shine.
Address the benefits customers will get from using your presets.
7. Create Promotional Material:
Design eye-catching promotional materials such as banners, social media posts, and advertisements. These visuals will help attract potential customers to your presets.
8. Offer Free Samples:
Consider offering a few free sample presets to entice potential customers. This gives them a taste of your style and quality, potentially leading to more sales.
9. Provide Customer Support:
Be prepared to offer customer support to assist buyers with using your presets effectively. Respond promptly to inquiries and provide helpful guidance.
10. Protect Your Work:
Include terms of use and licensing information with your presets to protect your intellectual property. Specify how customers can use the presets and if they can be used for commercial purposes.
11. Market Your Presets:
Promote your presets through social media, photography forums, and other relevant platforms. Collaborate with influencers or photographers to increase your reach.
12. Gather Feedback:
Encourage customers to provide feedback on your presets. Positive reviews and testimonials can build credibility and attract more buyers.
13. Continuously Improve:
Regularly update and improve your presets based on customer feedback and evolving photography trends.
14. Handle Payments and Delivery:
Set up a secure payment gateway for customers to purchase your presets. Once payment is received, provide customers with a download link to access their presets.
15. Stay Legal and Compliant:
Ensure that you’re following copyright and licensing laws.
If you’re using any assets (such as images) that aren’t your own, make sure you have the appropriate permissions
How do you create custom presets in Lightroom Mobile?
Adobe Light room mobile doesn’t provide a direct way to create custom presets within the mobile app itself.
However, you can create custom presets using the desktop version of Adobe Lightroom and then sync them to your Lightroom mobile app. Here’s how you can do it:
Creating Custom Presets in Adobe Lightroom (Desktop):
Edit Your Image: Open an image in Adobe Lightroom on your computer.
Apply Edits: Make the desired adjustments to your image using the editing tools in Lightroom. Adjust settings like exposure, contrast, color balance, and more.
Access the Develop Module: Navigate to the Develop module in Lightroom.
Create a New Preset: In the left-hand panel, find the Presets panel. Click the ‘+’ icon to create a new preset.
Name and Configure the Preset: In the New Develop Preset dialog box, give your preset a descriptive name. Choose the settings you want to include in the preset by checking the appropriate boxes.
Save the Preset: Click the ‘Create’ button to save the preset.
Sync to Creative Cloud: To make your custom preset available in Lightroom mobile, ensure that you’re logged in to your Adobe account and that the sync feature is enabled in both the desktop and mobile apps. Your presets will be uploaded to Adobe’s Creative Cloud.
Using Custom Presets in Lightroom Mobile:
Install Lightroom Mobile: Download and install the Adobe Lightroom mobile app on your mobile device.
Log In: Log in to your Adobe account within the Lightroom mobile app.
Sync Presets: If you’ve successfully synced your presets to Creative Cloud from your desktop Lightroom, they should automatically appear in the Presets section of Lightroom mobile.
Apply Presets: Open an image in Lightroom Mobile and navigate to the Edit panel. Scroll down to find the Presets section.
Here, you should see the custom presets you created on your desktop. Tap a preset to apply it to your image.
Adjust Preset Intensity: After applying a preset, you can adjust the intensity using the slider provided. This allows you to fine-tune the effect to your liking.
What File format is Lightroom preset?
Adobe Lightroom presets are saved in the .XMP file format. The .XMP format is an XML-based file format that contains metadata and adjustment settings for each preset. This format allows for better compatibility between different Adobe software and ensures a more consistent experience across platforms.
Previously, Lightroom used the .lrtemplate format for presets, but Adobe has been transitioning to the .XMP format for better compatibility and flexibility.
Please note that software features and formats can evolve over time, so I recommend checking Adobe’s official documentation or resources for the most up-to-date information about Lightroom presets and file formats.
The best light room presets for lifestyle photography can be saved to your mobile device.
How do I create presets in Lightroom on my iPhone?
Adobe Lightroom for mobile devices (including iPhones) allows you to create and save custom presets directly within the app.
Here’s how you can create a preset in Lightroom on your iPhone:
1. Open Adobe Lightroom:
Open the Adobe Lightroom mobile app on your iPhone.
2. Import an Image:
Import the photo you want to edit and use it as the base for creating your preset. You can import an image from your camera roll by tapping the ‘+’ icon at the bottom center of the screen.
3. Edit Your Image:
Use the editing tools in Lightroom to make the desired adjustments to your image.
Adjust settings like exposure, contrast, color balance, and more to achieve the look you want for your preset.
4. Access the Presets Panel:
At the bottom of the editing screen, you’ll see various editing tools.
Tap on the “Presets” icon, which looks like a small three-circle icon.
5. Create a New Preset:
In the Presets panel, you’ll find a ‘+’ icon. Tap on it to create a new preset.
6. Configure Your Preset:
In the “New Preset” screen, you can configure the settings you want to include in your preset.
These settings can cover Exposure, Contrast, Highlights, Shadows, etc. Toggle the switches for the adjustments you made to the image.
7. Name Your Preset:
Scroll down and give your preset a descriptive name that reflects the style or adjustments you’ve made. This name will help you identify the preset later.
8. Save Your Preset:
After naming your preset and selecting the desired settings, tap the checkmark or “Save” button at the top-right corner of the screen to save your preset.
9. Apply Your Preset:
You can now apply your newly created preset to other images in your Lightroom mobile app. Simply select an image, go to the Presets panel, and tap on the preset you’ve created.
10. Edit and Adjust (Optional):
Remember that presets are a starting point, and you might need to make additional adjustments to match the preset to different lighting conditions and subjects.
How do I create a preset in Photoshop?
Adobe Photoshop is primarily an image editing software and doesn’t offer the same preset functionality as Adobe Lightroom.
In Photoshop, you typically create and save actions instead of presets to automate repetitive tasks.
However, you can save your adjustments as an action and apply them to multiple images.
Here’s how you can achieve a similar effect to presets using actions in Photoshop:
Creating an Action:
Open Your Image: Open the image you want to work on in Adobe Photoshop.
Open the Actions Panel: Go to the “Window” menu at the top and select “Actions” to open the Actions panel.
Create a New Action Set: In the Actions panel, click the folder icon at the bottom to create a new action set. Name it something descriptive.
Create a New Action: Click the “Create New Action” icon (it looks like a paper with a folded corner) at the bottom of the Actions panel.

Name your action and choose the set you created in the previous step.
Record Your Actions: With the “Record” button activated (it looks like a red circle), start making adjustments to your image. This can include adjustments to exposure, color balance, filters, etc. These actions will be recorded.
Stop Recording: Once you’re done making adjustments, click the “Stop” button (square) in the Actions panel to stop recording.
Applying the Action:
Open a New Image: Open the image you want to apply the preset-like action to.
Select the Action: In the Actions panel, locate the action you created. Click on it to select it.
Play the Action: Click the “Play” button (right-pointing triangle) at the bottom of the Actions panel. Photoshop will apply the recorded actions to your image.
Fine-Tune If Needed: After applying the action, you can make further adjustments to the image if required.